

Game Cleaning Tips: Restoring the Outside of your Retro Gaming Cartridge

We all know the joy of finding a retro video games. Perhaps it’s one you’ve wanted to play for a long time, or maybe you’ve finally hunted down a super rare one for the collection. Unfortunately, 20+ year old games are rarely in top condition. I’d like to go over some tips for cleaning the outside of your retro gaming carts. (If you want to clean the game’s contacts inside, check out our internal cleaning guide.)
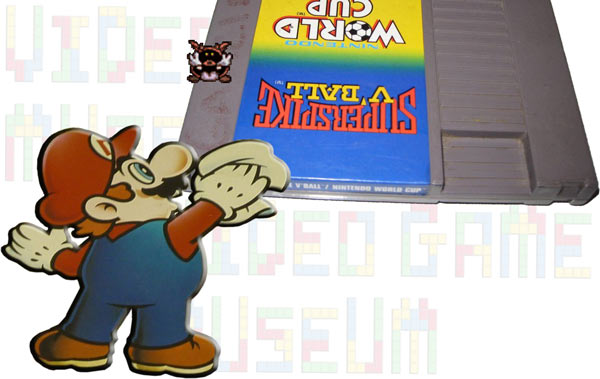
I’ve cleaned hundreds if not thousands of NES, SNES, N64, Genesis, and other retro game cartridges. While that often means just a quick touch up, many times it’s involved super extensive marker, dirt, and sticker removal. Murphy’s Law suggests that the rarer the game, the more likely it is that someone will have put a name, sticker, or some other horror on the label. Anyway, through trial & error, talking with fellow gamers, collectors, game store owners, and people at pawn shops, I feel like I’ve learned quite a bit. I’m always open to your tips and suggestions. This guide covers some of the wisdom I’ve learned along the way. As always, proceed at your own risk and do your research and safe testing before trying to clean your rarer games.
OPENING GAMES
First off, it’s handy to be able to open the games. This generally isn’t 100% necessary, but it’s insanely helpful if you have grime in the cracks between the game’s casing, etc. Additionally, it’s quite useful if you ever want to change your video game’s battery in order to regain saved game functionality. There are two main bits that you’ll want to pick up if you’re a collector. Both of these bits fit into your standard screwdriver handle. Additionally, both game opening security bits can be purchased at our eBay store.

3.8mm Game Security Bit allows you to open your Original 8-bit NES, SNES, N64, and Game Boy game cartridges. If you’re an old school Nintendo game collector like me, this is a must have.
4.5mm Game Security Bit allows you to open your Super Nintendo, Nintendo 64, and Game Cube consoles. Additionally, it?ll allow you to open your Sega console and Sega Genesis & Mega Drive game cartridges.
CLEANING THE OUTSIDE OF YOUR GAME
First things first, grab a couple rags and your favorite cleaning supplies.? As you’re looking around, here’s what I suggest:
Cleaning Supplies: Windex, Magic Eraser, Rubbing Alcohol, Goo Gone
Tools: Rags, Old Tooth Brush, Blow Dryer, Security Bit

Removing Dirt: Spray a rag with Windex or some similar sort of cleaner, and start scrubbing that plastic.? Just be careful not the wet the game’s label.? If the label itself is dirty, you can still attempt to clean (with caution).? If the label still has its gloss finish, you’ll probably be ok.? If it’s more of a worn and faded matte finish, be especially careful. Oh yeah, you can use a dry or slightly moistened old tooth brush to clean dust and grit out of those harder to reach places on the cartridge.
Removing Magic Marker: It’s pretty common to find a person’s name written in magic marker on old games.? People did this to prevent games from getting mixed up during sleepovers, etc., but it’s a big eye-sore now.? Your main two tools for removing magic marker are magic erasers and rubbing alcohol.

Magic Eraser: If you’re using a magic eraser, just lightly moisten it, and start scrubbing.? Since this is basically a specialized sponge, be careful not to let the water run from the sponge onto anything that might be damaged.

Rubbing Alcohol: If you’re going to use rubbing alcohol, just moisten an area of your rag, and start rubbing the ink/marker covered area. Given time, these two methods should remove most marker and probably any nearby dirt.
Removing Stickers & Tape: Lots of game stores & rental places put stickers on games. Dealing with these is probably the worst part of cleaning games. Use extra caution (and a ton of patience) when removing with stickers. Here are a few methods for removing stickers:
Peel & Scream: Well, this is the obvious method and definitely the worst one. Sort of like taking off a band-aid, you can grab a hold of that sticker, peel it fast, and pray for the best. Extra prayer is recommended if the sticker is on a label, since prayer is about the only thing preventing this method from destroying the game’s label underneath. In reality, you shouldn’t use this method unless the sticker is on a safe area of the game’s plastic.
Windex: Using Windex you can lightly moisten the surface of the sticker. Let it sit for a minute or two. The Windex should soften up the sticker over time and will let you scrape it away with a fingernail. As a note, this method is extra risky if the sticker is on the game’s label. Additionally, it obviously doesn’t work on waterproof stickers, vinyl stickers, etc.

Blow Dryer: It turns out that blow dryers (aka in man-speak as “heat guns”) are pretty awesome for removing stickers.? The idea is to use hot air to heat up the sticker.? The sticker’s glue generally starts to soften and loosen up when heated.? When done just right, that means you’ll hopefully be able to simply heat and peel off the sticker.? The trick here is tons of patience.? A stubborn sticker may need to be heated, partially peel, reheated, peeled a little more, reheated, etc.? Since thrift stores seem to love using packing tape to bundle items, this method is pretty good for removing that sort of material as well.

Goo Gone: Once the sticker is off, it’s time to get rid of any sticker residue.? Goo Gone is great for this.? Just apply a little to your cleaning cloth and start working on that goo.
If you haven’t already, check out our YouTube videos for cleaning & repair tips.? If you want to clean your game’s internal contacts, check out our internal cleaning guide.? Best of luck as you’re restoring your retro gaming collection, and happy retro gaming!
YOUR METHODS?
I hope this guide will give you some ideas for cleaning your cartridge based video game collection. If you have any cleaning tips or suggestions for this guide, just send me a message or post a comment below, and I’ll be happy to add them.
As with any guide, experiment and find out what works for you. Feel free to check out the Video Game Museum Amazon and eBay stores for rare vintage games and cartridge opening bits. Most of all, happy collecting and have fun!


